Add Filter
Overview
The process to add a filter is available through the Edit Filter Window, which can be launched by clicking the Edit Filter Button in the Samples Window.
Add Filter
To add a filter:
-
Click on the Edit Filter Button in the Samples Window.
-
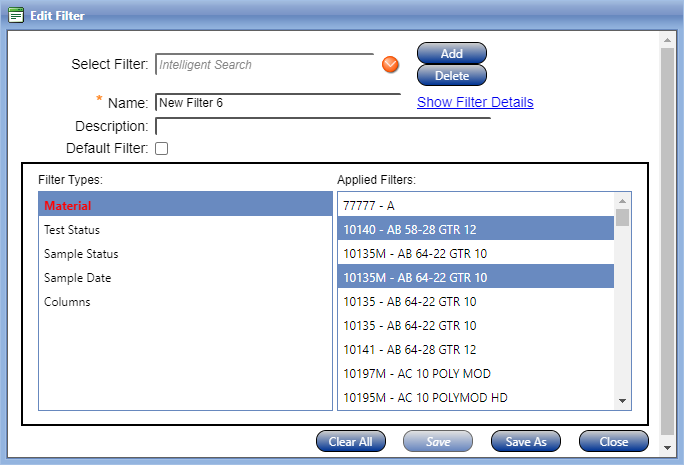
The Edit Filter Window will appear.

-
Click on the Add Button. This step is necessary, otherwise an existing filter may be accidentally edited.
-
Enter a Name for the filter.
- Add a description, if necessary.
-
Check the Default Filter box if the selected filter should be the default filter.
- In the sections below, select the Filter Types on the left and their associated values to filter on the right.
-
Click on the Save Button.
Notes
-
To create a new filter, it is necessary to click the Add Button before editing a filter and before saving.
-
Selecting multiple 'applied filters' uses the "OR" operator, while adding a second filter type within the filter uses the "AND" operator.
-
The only required field for a filter is the name.
-
A filter with no applied filters will include all samples.
-
Once a filter has been applied for a Filter Type, the name of the Filter Type will change to red font. (in the pictured example above, Material has been applied).
-
Users are prevented from saving changes to a system item to which changes have already been made. This prevents concurrency errors.